First-time setup
This guide is for someone opening Posterizarr for the first time. Follow it in order; you do not need to understand every setting before getting started.
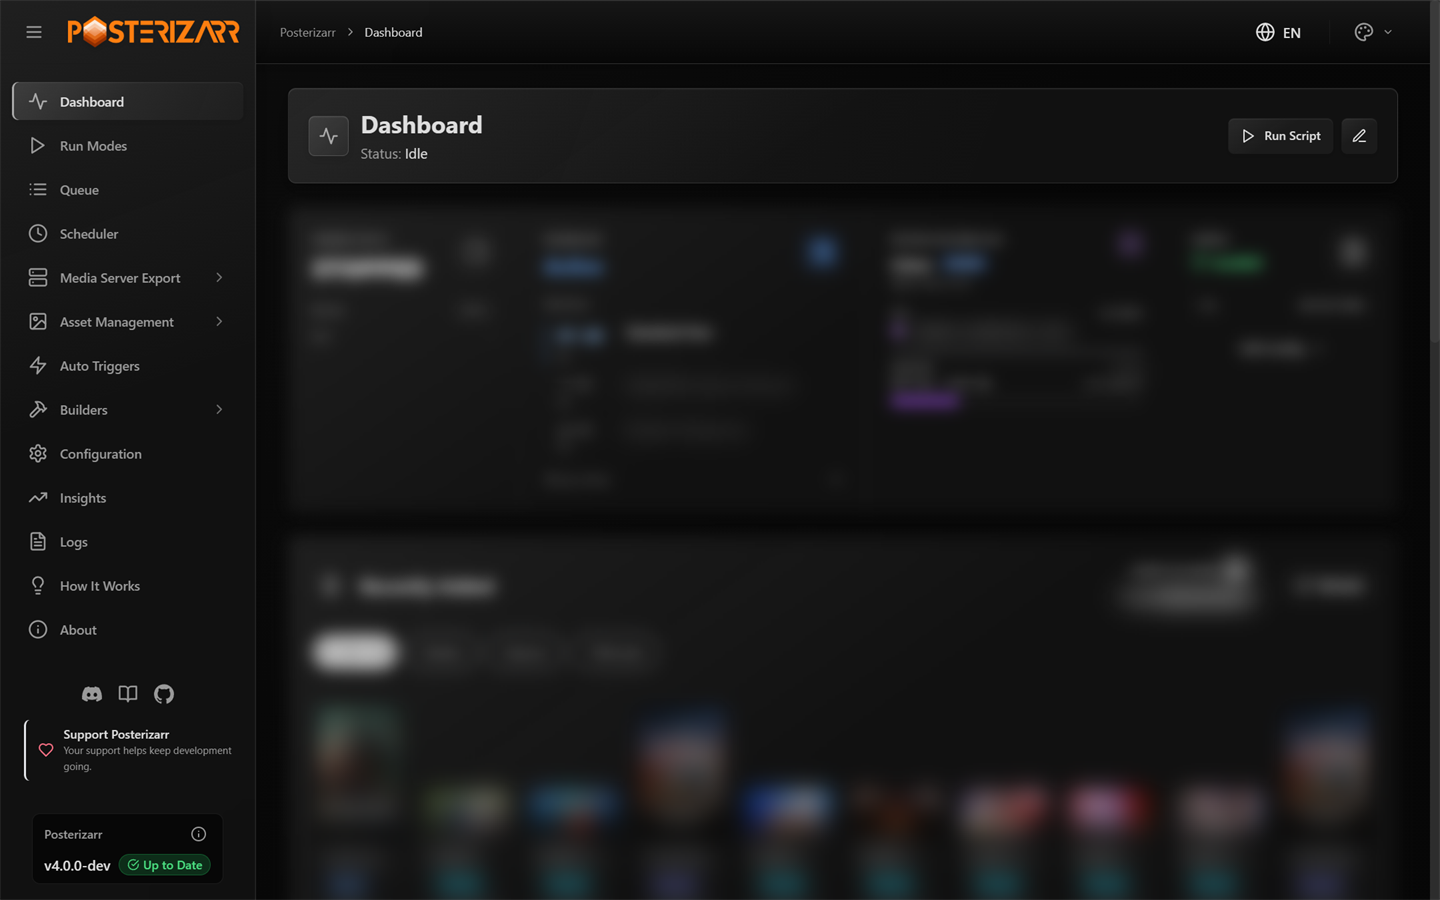
After opening the Web UI, start at Dashboard in the left sidebar. The sidebar remains the main route to configuration, runs, assets, builders, and automation.
1. Choose how to install
- Docker: the recommended route for most home servers. Start with Choose an installation method.
- Unraid: install the Community Apps version, then check the Unraid notes.
- Windows or Linux without Docker: use the manual PowerShell walkthrough.
The separate Web UI from source guide is for development or manual UI setups, not the normal Docker or Unraid installation.
2. Gather only what you plan to use
Have your media-server address and API credentials ready. Add artwork-provider credentials for the providers you want to search. Start with the requirements checklist; optional services can be configured later.
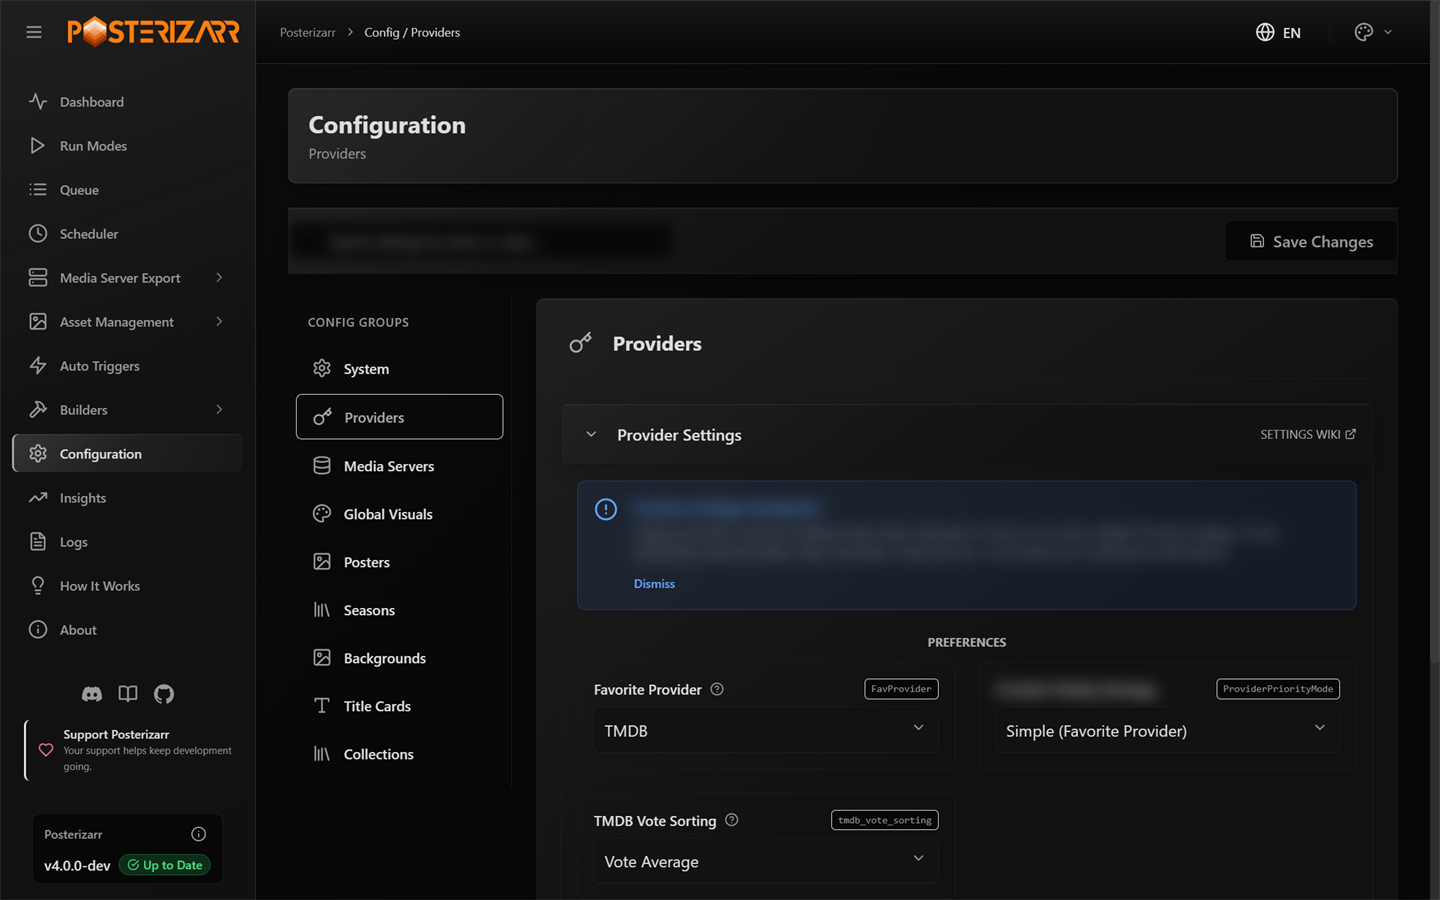
Open Configuration > Providers to enter only the artwork-provider keys you plan to use.
Keep API keys private. Do not paste them into screenshots, support posts, or public configuration files.
3. Start Posterizarr and open the Web UI
After installation, open the Web UI from the same machine or network as the
server. Docker's default published port is 8000, so the local address is
usually http://localhost:8000; replace localhost with the server address
when opening it from another device. If it is not reachable, see
Networking.
If the first-run setup appears, use it to connect your media server and choose the libraries Posterizarr should manage. Otherwise, open the configuration area in the Web UI and check the same items there. Do not enable every library just to get through setup; begin with one test library.
Automatic First-Run Wizard
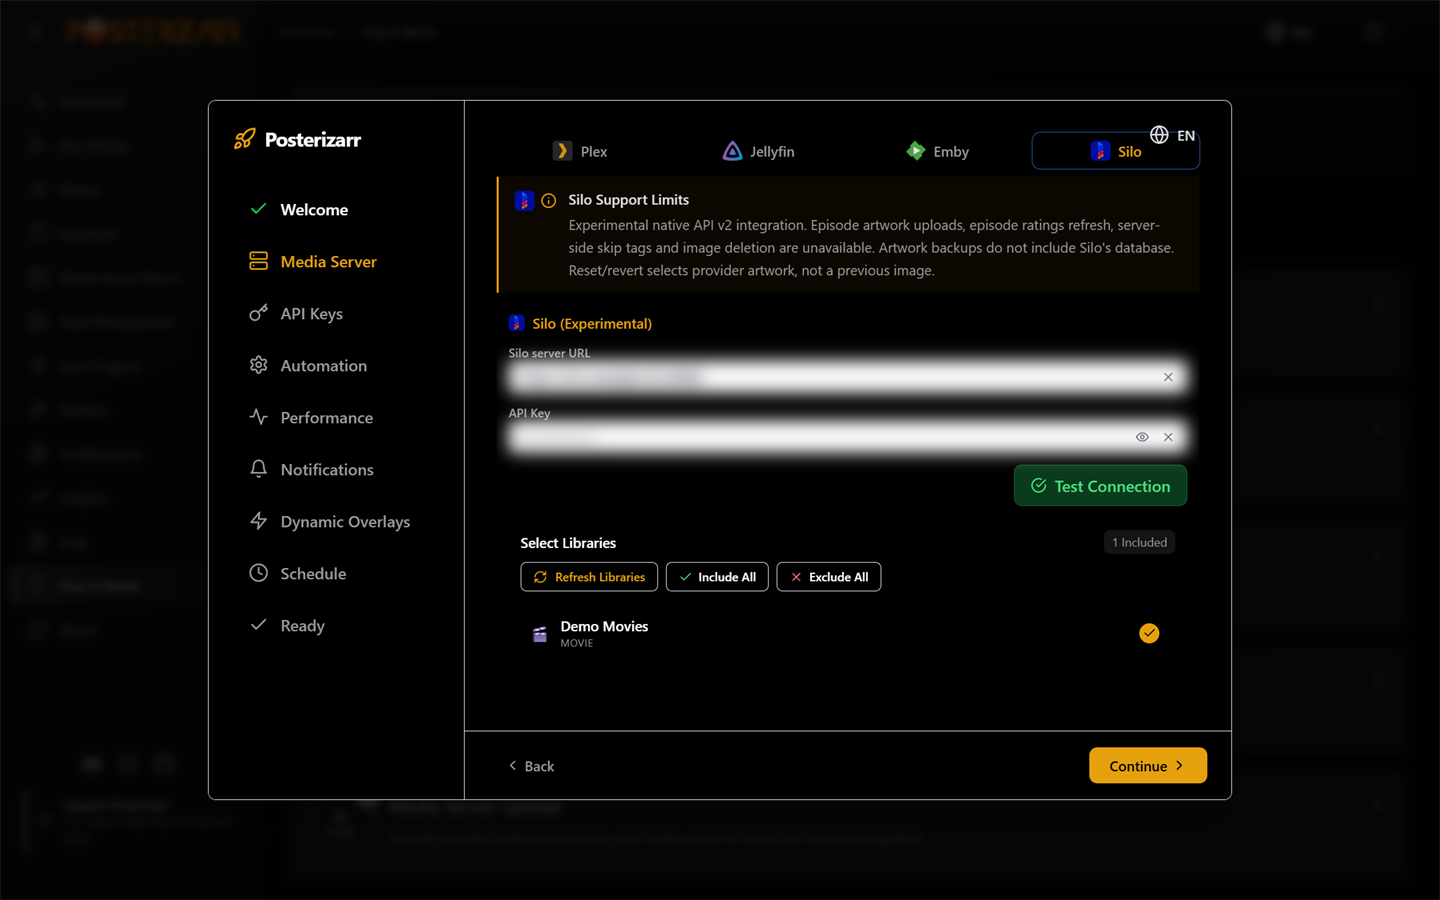
The wizard appears automatically while the initial configuration is incomplete. Choose a primary server, validate its connection, and select libraries before continuing.
The wizard is a nine-step modal, not a sidebar page. It opens automatically when Posterizarr has not recorded setup as complete. Finish Setup saves its configuration; before then, form edits remain in the wizard. Continue is gated on a validated server/library selection and on entering at least one primary metadata provider key (TMDb or TheTVDB).
| Step | What it configures |
|---|---|
| Welcome | Introduces the guided setup. |
| Media Server | Choose Plex, Jellyfin, Emby, or experimental  Silo; enter credentials, test the connection, and select libraries. Plex users can optionally configure a secondary Jellyfin or Emby sync. |
| API Keys | Enter a TMDb Read Access Token or a TheTVDB Project API key (at least one is required to continue; you can enter both and choose a preferred primary provider). A Fanart.tv personal key is optional. Test buttons are available for each provider, and provider priority is configured automatically from the entered credentials. |
| Automation | Choose whether to clean unused assets, skip Japanese/Chinese titles, and skip TBA title cards. Leave cleanup off until library scope and exclusions are correct. |
| Performance | Set Image Processing, output quality, retained logs, and parallel jobs. Lower parallel jobs on memory-limited NAS devices. |
| Notifications | Choose none, Discord, or Apprise; Uptime Kuma can be configured separately. |
| Dynamic Overlays | Optional. Enable the feature and continue into its dedicated Setup Wizard after finishing. It starts in Dry Run. |
| Schedule | Optional. Choose a run mode and daily, weekly, monthly, or interval schedule. Logo Updater also exposes library, force-replace, EXIF-check, and revert options. |
| Ready | Save the configuration and complete onboarding. If scheduling was enabled, the wizard enables the scheduler and creates the selected job. If Dynamic Overlays was enabled, its Setup Wizard opens; otherwise the wizard opens How It Works. |
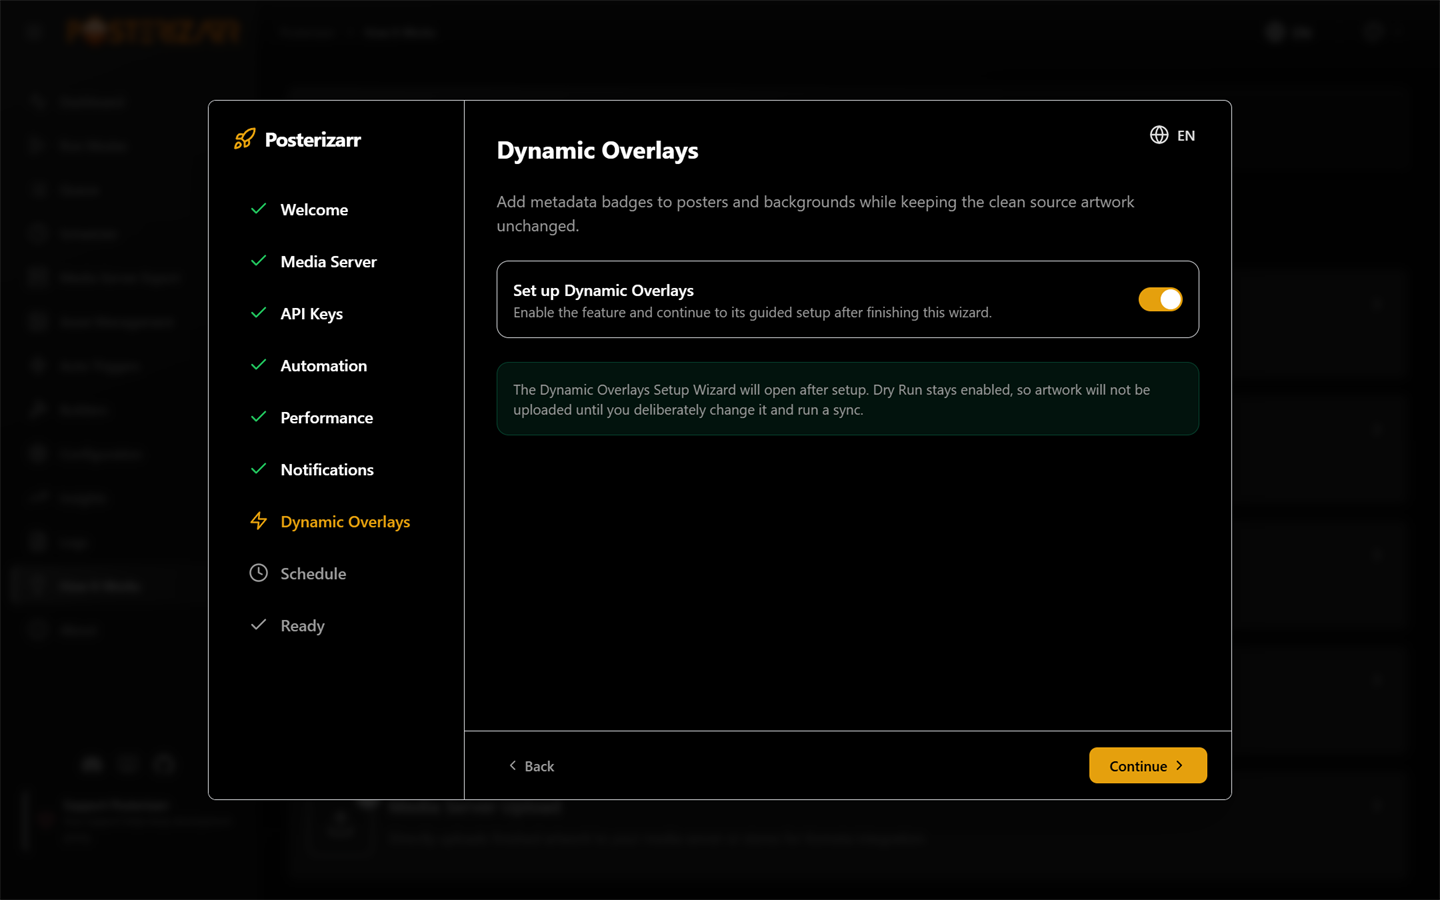
Enable Dynamic Overlays here to open its guided setup after finishing. The first-run choice keeps Dry Run on and does not upload artwork.
For Docker, set RUN_TIME=disabled before enabling a schedule here so the
container timer does not compete with the Web UI Scheduler. If you leave the
schedule switch off, no onboarding schedule is created.
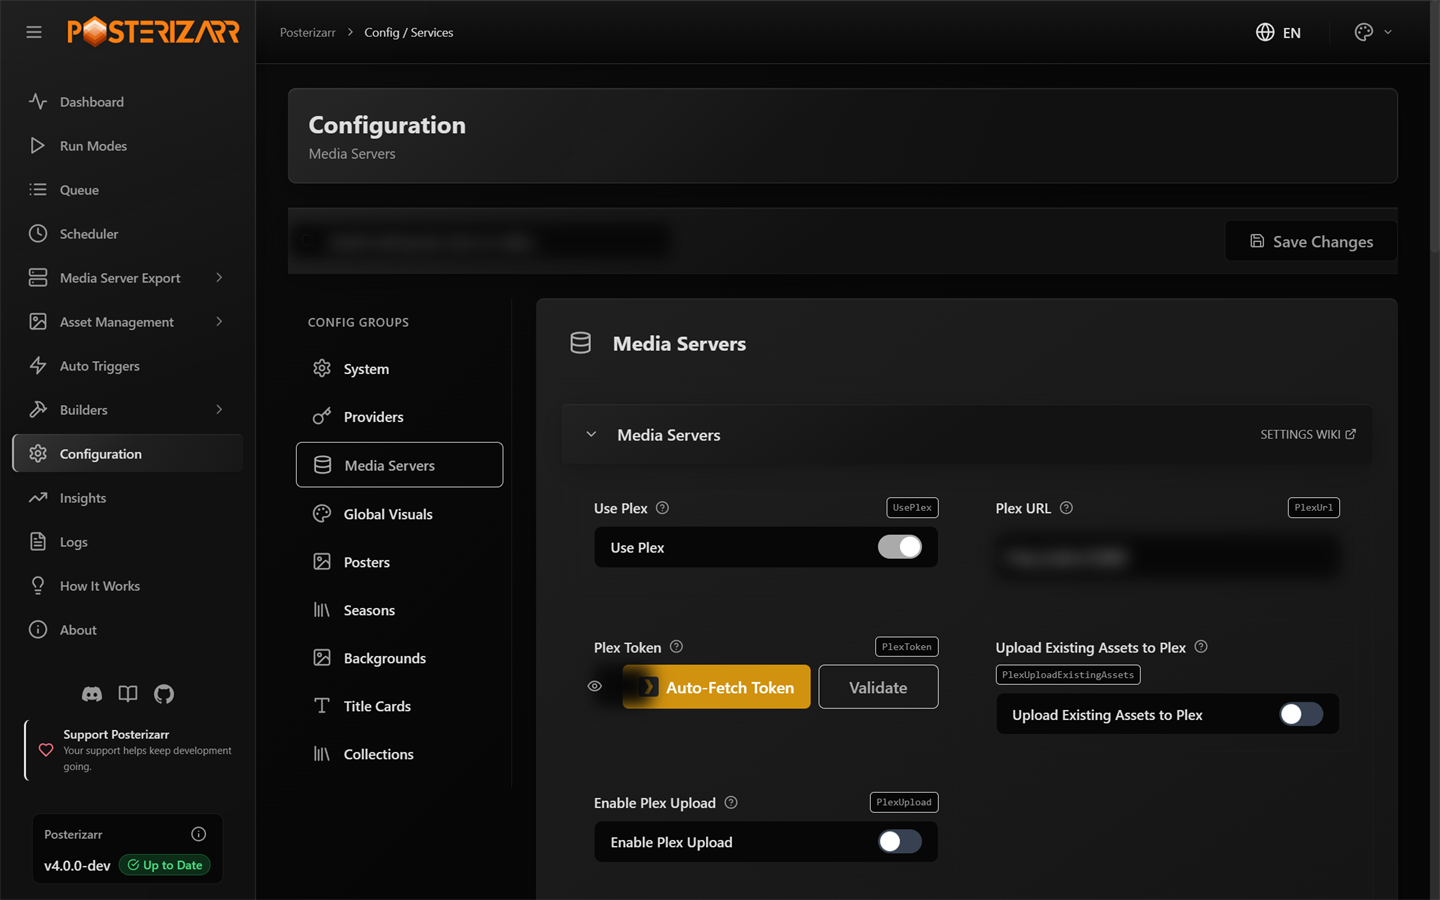
Open Configuration > Media Servers to validate the server URL/key and choose the first library.
4. Check what Posterizarr will create
There are two different test workflows, both available in the Web UI:
- Artwork styling: open Run Modes > Testing Mode. It creates sample images using your current settings and opens the results in Test Gallery. It does not upload artwork to a live media server. See Testing Mode.
- Dynamic Overlays: open Builders > Dynamic Overlays, use its Setup Wizard, select one library, and keep Dry Run enabled while checking rules and previews. Dynamic Overlay Dry Run renders changes but does not upload artwork. See the Dynamic Overlays guide.
These are separate checks: Testing Mode checks generated artwork styling, while Dynamic Overlays Dry Run checks overlay rules and placement.
5. Run a small first job
Start with one library or a targeted item. Before a normal run, review whether direct upload is enabled for your media server and where generated assets will be stored. The configuration reference explains those settings. If you use Dynamic Overlays, keep Dry Run enabled until the preview, library scope, and logs look right.
6. Automate only after checking the result
Once the artwork looks right and the destination is correct, configure a schedule or an integration such as Sonarr, Radarr, or Tautulli. See Run modes and automation. You can return to Posterizarr's main features, browse the artwork showcase, or open the guide for a specific task from Use Posterizarr in the navigation.